START HERE!
Always start with this link to see the Order of Operations for the Mansion Style Advent House. That is where you'll have access to links to all of the most current instructions.

Monday, November 13, 2017

Door Assembly


THIS POST HAS BEEN SUPERSEDED HERE: New Door Assembly Instructions


The instructions below are for an earlier version of the door assembly and should only be used for those older door kits that would have been received prior to August 2020.


Once you have the Gluing Jig complete, you can now build the windows and doors far more easily.

These following steps show you how to assemble the Door.


THE DOOR KIT:


This is how we start the door, all packaged up and ready to assemble.


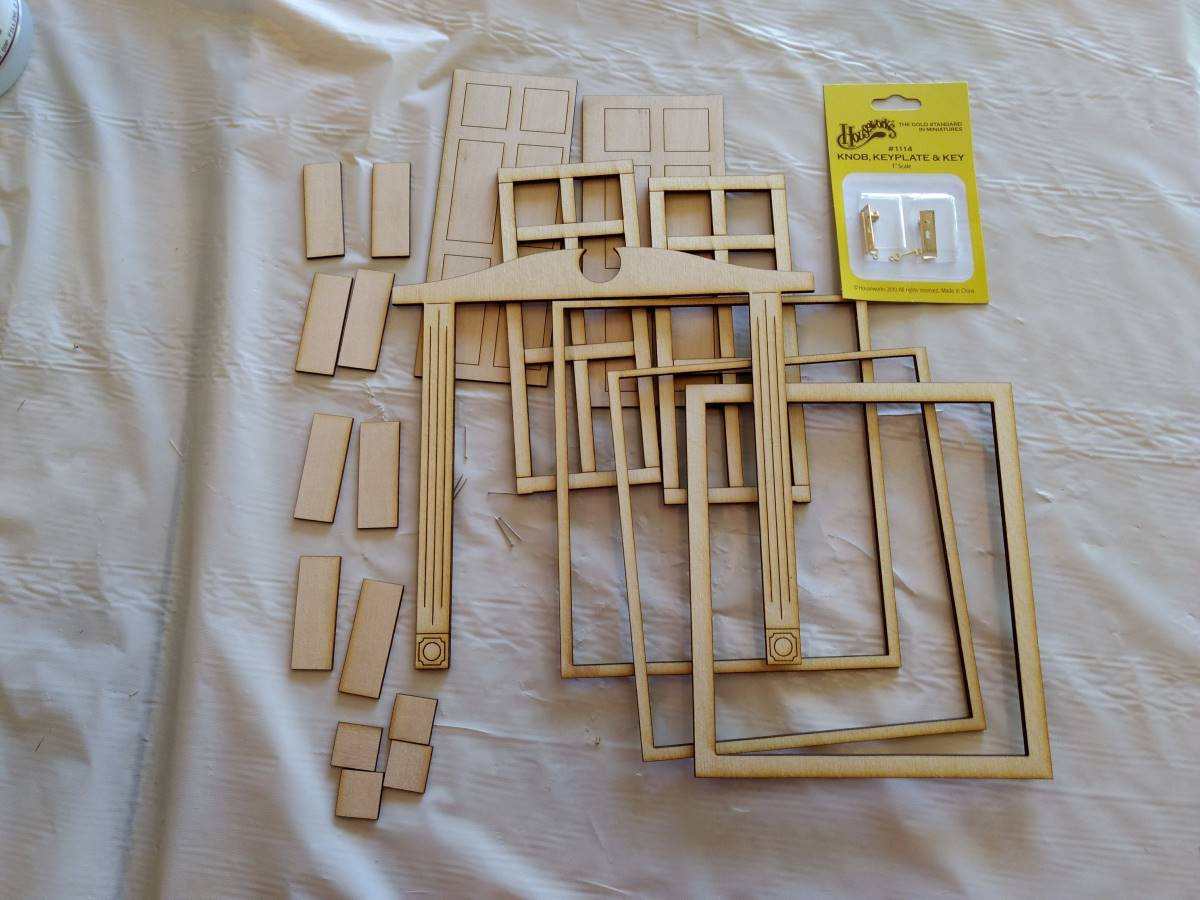
Contents include a front frame, a back frame, a back block, a face, 2 door panels, 2 door panel backs, 12 raised panel pieces, 4 hinge pins and a pack of 2 door handles.


DRYFIT ORIENTATION:


FIRST THINGS FIRST:  (2 VERY important steps)

FIRST, make sure you have the 2 frame pieces orientated with the smaller (narrower/thinner) part/edge AT THE TOP.  The thicker part of the frame goes on the bottom of the door.


SECONDLY:  Make the distinction of the Front Frame (with hinge holes) and the Back Frame (with NO hinge holes).  Obviously, the Front Frame (with hinge holes) will be on the front and will be where the door panels hinge on the frame.  The 'back' frame goes between the front frame and the back block (which is the thicker edged frame piece)

Now you may notice there is a 'front side' and a 'back' side of each of these pieces (the backs of the pieces have some minor darkening around the cut areas.  (Keep in mind these parts are precision laser cut).

Align the two 'back sides' of the two frame parts for gluing.


DOOR FRAME ASSEMBLY:


Using the Gluing Jigs (shown above and described here), we'll now press the two opposite corners of the door frames and glue them up.  Using the jigs ensures that the two frames are properly aligned.  We have designed most of our kit with pretty tight tolerances so keeping things aligned is paramount.


In the image above, you can see the Gluing Jigs on opposite corners.  Gentle Pressure towards each other will ensure the frames align properly.  (Be sure to not push too hard or you may skew the frames)


Now add glue to one of the frames, set on top of other, use the gluing jig to align, then apply pressure to glue to the two frames together.

And you get the following:


Make note of the Hinge Hole location because it will be VERY IMPORTANT on this next step!


ADD BACK BLOCK:


We now align the back block withe now-glued frame.

NOTE THE ALIGNMENT!

The Front Frame (with the hinge hole) is on TOP, then the Back Frame (no hinge hole), THEN the Back Block (fatter edges).


Place the Back Block on the table with the 'Good/front face' UP!  This will provide a bit better gluing surface for later on.  So if you can tell the difference on the front face and the back face, place the back face DOWN.


Add glue to the back of the back frame (non hinge piece).


Use the Gluing Jig to hold the corners and apply pressure to glue well.


Your door frame should now look like this!


ADD DOOR FACE/TRIM:


Now we add the Face/Trim to the door.  Place the 'now-glued-up' frame with the Back Block DOWN on the table.  (this places the Front Frame (with the hinge hole) on TOP)


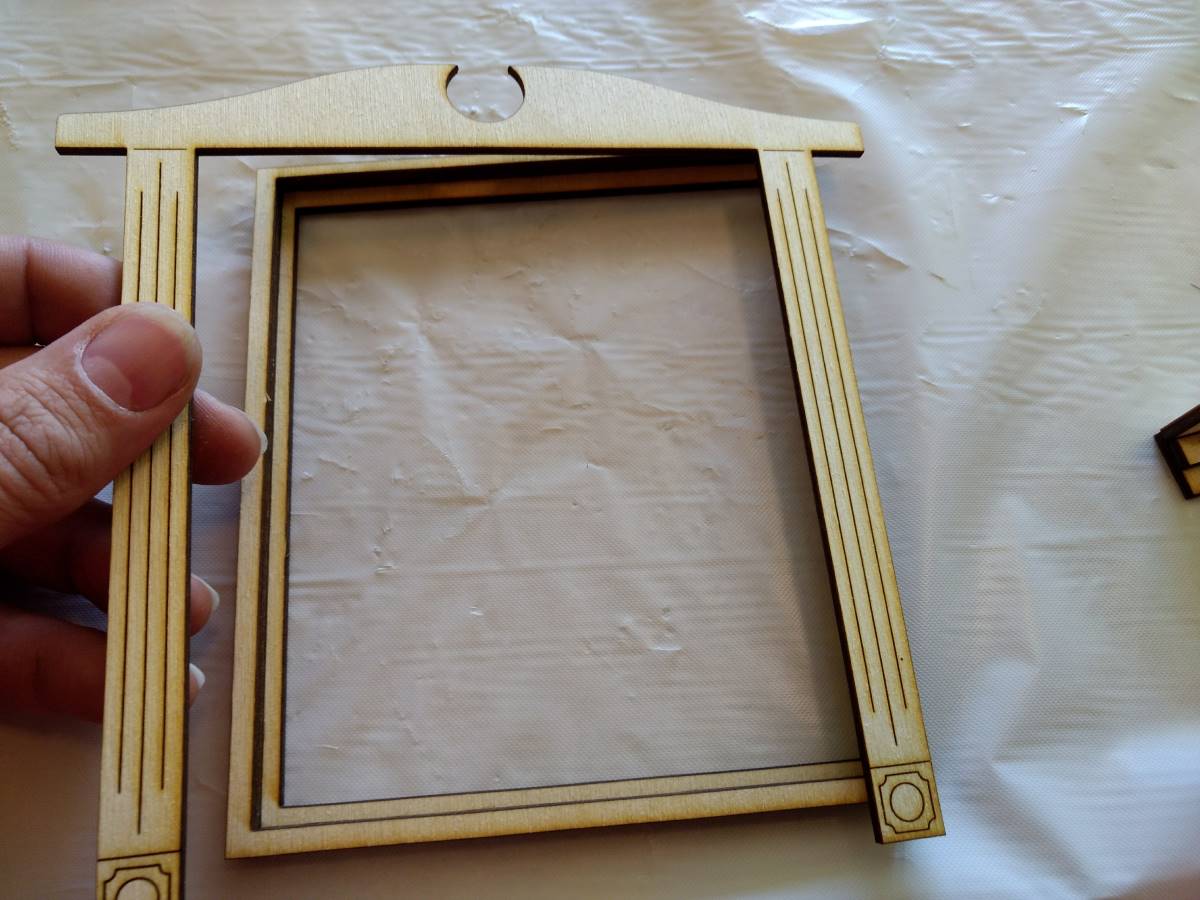
Align Door Face with front of frame.


Make ABSOLUTELY SURE that the top two inside corners of the door face/trim align with the inside corners of the frame.

Add glue and apply pressure to finish assembly.


Here is your door frame complete!  Make note of the location of the individual parts.
You can now add a little extra CA glue to the backside of the seams if you'd like a little more security.


DOOR PANELS ALIGNMENT:


Dryfit and align the back panels with the front panels. 

NOTE: 
#1 - The thinner panels (with line etching only) are the back panels, the thicker front panels (cut through) have a hinge hole.
#2 - The small squares both need to be at the top of the door.
#3 - There is a small bump on the hinge side.  This little bump should align perfectly with both the front and back panels.  This is how you verify you have the doors aligned correctly.

Most importantly, YES - the back panels are different widths than the front panels.  This is designed so that light will not come through between the doors.  When the panels are assembled, the right hand panel will open first (because the back panel of the left-side door will be behind the front panel of the right-side door)


Once aligned and you are sure the correct panels are in the correct place, you can then add glue to the back of the front panel, align with the back panel (while pressing both down on a hard surface to help align the side) and carefully press the two panels together.

Most importantly, please be sure these two panels are well aligned.  In the event they aren't perfect, you can use an Exacto knife to trim off any overhang of the back panel.


Repeat on the other door panel (shown above)

The next step on the door panels is to round over the hinge side.  This can easily be done with a simple piece of sandpaper, or you can carefully use a band sander - whatever your preference.


As shown in this image above, you want to round off that hinge edge just a bit so that those corners don't interfere with the frames while the doors are swinging.

Just note - it's easier to sand more off than to add wood back on, so sand slowly until it looks and works well in the frame.


RAISED PANELS:


Now we add the raised panels into the Frame cutouts.  Do NOT use super thin CA glue here - you probably want to use a gap filling/thicker one.

Layout the small raised panel pieces on either side of the door, to align with the proper sized openings. 

Add CA Glue to the openings (you can do them one at a time if you'd prefer).


Now drop the correctly sized raised panel into the correctly sized opening ** BUT Don't Push It Down Yet! **

Instead, use an Exacto knife to carefully move the raised panel a bit (the raised panel will 'float' a little on the thicker glue) until you have it where you want it (probably centered in the opening), then carefully apply pressure to the raised panel until it is well glued down.  At this point - the raised panel piece should not be able to move at all. (so make sure you get it right the first time).


Then repeat for every opening, as shown above.


Do one more application of pressure over each piece just to be sure they are well secured.


And now the panels are assembled.  And in this image above, you can also see how the back panels are different widths and allow them to 'nest' with the other door when closed.


NEXT STEP:

After the door is assembled, it will be time to paint.  But you may choose to paint all the windows with the door.  If so, assemble all the windows first.  You can learn more about assembling the windows.


Questions?  Please feel free to contact us on our website!


Start Here: Glue up the Gluing Jig!

NOTICE: With the new Door and Window designs, this gluing jig is no longer needed.

This post has been superseded.


Where Do You Start on this Awesome Advent House Kit?

RIGHT HERE!

Start with the Gluing Jig to make the window and door assembly a breeze!

These following steps show you how to assemble the Gluing Jig.


THE BLOCK:


This is how we start.  This is the Gluing Jig Block.  This block doesn't really have a front and a back.  Pop out all the pieces and prepare to assemble.  You'll want some gap filling CA Glue and a nice hard working surface that you don't messing up by getting some glue on it.

There are 2 jigs in the kit (one for each corner).  There are 4 pieces per jig (one set on the left and one set on the right of this image)


BEGIN ASSEMBLY:


Once all the parts are separated (and the tabs cleaned up if you want), We begin assembly.  You'll want to dryfit parts together before we break out the CA Glue.


DRYFITTING:


This jig has been designed to go together in only one way.  We have tabs for all the parts except for the smaller "L" Shape piece.  Note that the ends of each piece are flush with the others.  Once you have the orientation correct, proceed.  Do not glue if you are unsure of the orientation!  Contact us if you can't figure this out - we're happy to help!

The 4th part is the smaller "L" shape and that will be applied during gluing.  (it doesn't really require dryfitting)


START GLUING:


Make note of the locations that will be in contact during assembly and apply Gap Filling CA Glue to those areas

Make sure you get glue on the inside edges as well


Once you have glue where you need it, begin assembly of glued parts


GLUE UP:


Using the "L" Shaped parts of the 2nd jig, press into the inside corner of the jig you are gluing to hold a nice tight (and square) inside corner.

In this picture above, you can also see the smaller "L" Shape piece is being glued on the backside of the glued jig to help hold it square and true.


ASSEMBLED:


This is one of the finished Gluing Jigs, all glued up and ready to assist you in putting together the door and windows fast and easy.


REINFORCE:


Last step is to reinforce all the joints by adding some additional CA Glue to all the seams.  Allow the CA glue to penetrate just a bit and the jig will never come apart!

Allow to dry/cure fully!


NOW REPEAT:


Once the one jig is glued up, you can now repeat with the other jig, using the back of the already glued up one as a brace to ensure the second jig is square and true like the first one.


FINISHED!


And the Jigs are complete!  See how simple that was!  And now these jigs will be used to square up and even out the frames for the door and all of the windows.  Ensure the parts


NEXT STEP:

Once the jigs are complete - move on to assembling the windows.
Or you can assemble the Door.


Questions?  Please feel free to contact us on our website!


Thursday, November 9, 2017

Mansion Style Order of Operations


The instructions below are old and can be ignored.

________________________________________________________________________________

We are working hard to make your dream of having an Advent House this year in your.  Here is a semi-detailed step-by-step guide and order of operations for when assembling your Mansion Style Advent House Kit.

Start by assembling the gluing jig

Using the gluing jig:
Glue up all window frames and backs
Orient the windows for correct swing (for when assembled to the structure)
Apply the face and the sill
You can apply keystone here or later
(ensure all shutters swing as desired before painting)
Then glue up door (ensure doors swing smoothly as desired before painting)

Then paint all window parts and door parts (30 min)

While the window and door parts are drying - begin assembly of structure

Assemble the Structure

Transfer Fencing Holes to faces of roof top
Drill roof face fencing holes

Assemble Fencing with fencing beams
Paint fencing

While fencing is drying

IF USING LASER BRICK
Apply Laser brick to structure,
sand/putty/sand brick corners
Texture entire house with gray stone texture
ELSE (using plastic or clay brick)
Texture bases and roof (not walls)
ENDIF

While Structure texture is drying,

Assemble the Tower Cuppola, trim and spire.
Paint Atrium Faces & Tower Faces and Top assembly

While atrium faces and tower are drying, Apply vellum to back of shutters
Print window pictures on vellum and apply to frames
Print door vellum and apply to door frame

Apply keystones if not yet applied

Once structure is dry,
IF USING LASER BRICK
Mask off bases
Paint Walls/Brick the color of your choosing
ELSE (using plastic or clay brick)
Apply Brick to Walls
Once dried/cured
Grout brick
ENDIF

Once structure /brick is dry
mask off walls and bases
paint roof color(s) of your choosing

While structure is drying,
Assemble Atrium Structure
Paint back of Atrium Structure

While atrium structure is drying
Apply vellum to Atrium faces and Tower Faces

Assemble fencing magnets to fencing AND faces
(make special note of magnet orientation N/S)

Begin final assembly:
Assemble windows into structure
Assemble Door into structure
Assemble Atrium faces to Atrium Structure
Assemble Tower
Assemble Atrium and tower to Structure
Assemble Fencing to Structure


And that's it!  Now you can add snow and icicles and decorations and even lighting if you want.

Use our contact page if you have any questions.

Monday, November 6, 2017

NEW BETTER PRICING!

We told you you'd like this news.  We are always working to improve the design and assembly and quality of our products and we have done it again.  With the recent completion of the redesign of the Full Mansion Kit, we are now able to offer this Kit at an incredible price.

Starting today (2017.11.06), the Full Mansion Kit is now only $349.99!

Don't miss out for this Christmas!  Buy your kit today and get it assembled and completed before December 1st!  You know you've wanted one of these for a lot of years and maybe the price has just been outside your grasp.  But not anymore!

Kit's are shipping now!  So order today and get yours on the way!


What's better than that?  I'll tell you.  Maybe you aren't interested in the kit.  Maybe you simply want to open the box and set up Completed Advent House on a table.  Maybe the price tag has been too high for this item online.

But no longer!  The price of the Completed Mansion Style Christmas Advent House has been dropped significantly!

Starting today, the Completed Mansion Style Christmas Advent House is only $1399.99!  

This completed House is ideal for those who have no interested in assembling a kit. The complete Advent House comes with Plasti-formed Brick with light tan grout, textured roof and interior lighting as well!


So whether you want to be able to tell your friends that you built it with your own hands, or if you just want to set it up and be ready, now is the time to buy.  Get either of these items at extraordinary pricing, just in time for this Christmas Season 2017!

So visit our store at http://www.AdventHousePlans.com and Buy Now!