START HERE!
Always start with this link to see the Order of Operations for the Mansion Style Advent House. That is where you'll have access to links to all of the most current instructions.

Tuesday, December 20, 2011

Illustrated Window Build

Here it is - the Illustrated Window Build.  This is the step-by-step into building your windows for your Advent House.

The end goal looks like this:


So how do we get there?  We follow these instructions, as illustrated below:


--------------------------------------------------------------------------------

Beginning

We start the Window Build by painting.  Paint one side of each window frame and window light, making sure you get the edges too.  Whatever method you choose to paint, get everything painted up and dried well.  Hang the parts from a line, lay them on the ground, spray paint, craft paint.  Your choice. Keep in mind that the Keystones and Dormer Extensions will absorb paint differently than the frames and lights so you'll need to ensure they end up the same color by painting different amounts on the parts.

After painting and drying, you'll need to attach the Vellum to one side of the window lights.  To do this, reference the Tower Frame instructions.  In short, lay the window light on a protected surface and lightly spray with spray adhesive.  Then carefully lay the vellum on top.  After drying, use a sharp knife/exacto knife to trim all edges.  Do this to half of the window lights (the other half get glued to the back of these 'vellumed' lights).

In this image you can see I'm trimming the pieces out of the full sheet of vellum.


--------------------------------------------------------------------------------

 Mark Hinge Locations

Next we mark where the hinges will be.  Since the hinges (the little black nails) have depth, we need to trim a small amount of material out of the hinge location.  Stack two window lights and place them inside a single window frame. (this brings the window light with the vellum up to the same level as the window frame)

Mark or cut a line in the center of the window light and the corresponding location on the frame.  Make note on the frame of the bump-out where the hinge will be.


--------------------------------------------------------------------------------

Mark Top Location

Also mark the top location for the hinge.  Be sure the window light is totally centered in the window frame before marking.


--------------------------------------------------------------------------------

Trim Hinge Location

Now take the time to trim out the vellum and wood so that the hinge will sit in there and the two window lights will still fully contact each other.

Make sure you trim both sides equally so the window light is centered in the window frame.


--------------------------------------------------------------------------------

PreFit Window Lights

After placing the hinges in the window light and gluing the two faces together (you'll use spray adhesive on the non-vellum window light then press the two together.)  You will have the hinge in place.

Now lay the window light assembly into the window frame and trim the window frame to have the hinge fit there as well.


--------------------------------------------------------------------------------

Semi-Completed

After ensuring the hinges fit well, glue the two frames together, sandwiching the window lights and hinges in between.  You'll probably want to keep pressure on this assembly while the adhesive dries.


--------------------------------------------------------------------------------


At this point, the window assembly can go several directions.  First, if you plan on using this as a 'wall' window (not on the roof), then you're almost done with the assembly.  You'll need to add the keystone, the keystone backer (optional), determine the orientation of the opening, add the window image on the back and put on the window handle.

To determine the direction of the window opening, consider where all of the window will be on the house.  If the window is on the right-hand side, you'll want the window handle to be on the left of the hinge and vice versa on the other side.  If it's a middle window, it's your choice.


--------------------------------------------------------------------------------


Additional Details on completing the Windows are pending.

--------------------------------------------------------------------------------


Monday, November 28, 2011

Cyber Monday 2001!

Take advantage today by using the Coupon Code: CyberMon11 to get 10% off your entire order.  But make note that there are only 10 total uses available!  Buy now and use the code to save you money today only!

Wednesday, November 23, 2011

Not buying the full kit? Check this...

If you are feeling more adventurous and don't plan on buying the full mansion kit, then you may be wondering which of the parts you should plan on buying and which ones you will plan on cutting yourself.  Here is a simple list with my suggestion of parts that are in order from most difficult to cut to easiest to cut.

1 - Window Frames - These window frames are cut from 1/8" basswood.  This means a simple Xacto Knife would leave quite a challenge to get these cut out.  They make Xacto Knives with serrated edges, and that might help a little, but it's still going to be a challenge to get all the window frames cut out.  Keep in mind there are 2 frames per window.  That's 48 window frames!  Trust me.  If you are looking to cut time and effort, buy these window frames first.

2 - Window Lights - The window lights are cut from 1/16" basswood so cutting becomes much easier.  But the issue with these is all the small squares that need to be cut out, and - there are still 48 window lights!  Yes, 2 window lights per window.  That's a LOT of cutting.  After the Window Frames, my suggestion would be to buy the window lights.

3 - Atrium Faces - While the windows are cool on this Advent House, and they are the ones getting used, it's really the Atrium that 'shines'.  (literally).  So ensuring proper cuts on the Atrium faces is essential for a great display.  The atrium faces are cut from 1/16" basswood, so it's totally doable with an Exacto Knife, but  the many, many cuts, the precision curves, and the size of each face all contribute to a challenge in itself.  A great step in saving time and effort, we suggest buying the Atrium Faces. (or just get the entire Atrium Kit)

4 - The Door - In the plans, I provide instructions on how to build a door.  But, really, we're talking about hours and hours of work in that process, and just hoping for it to work properly.  Just trust me and go with The Door.

5 - The Structure - The woodworker in you is saying, 'What? that's the easy part!  I have a table saw!'.  And indeed, a well stocked woodworking shop will have everything you need to cut the main structure pieces.  But the Structure is in the top 5 because of several factors.


  1. There are LOTS of windows and they each need to be cut by hand, or with a scroll saw, or a fine-tip router.  There is a lot of time involved there.  And one slip of machinery and you'll be re-cutting that part again.
  2. Each piece needs to be close to perfect.  With 1/4" thick material, there isn't a lot of fastening surface so each piece needs to be nearly perfect to provide sufficient surface area.  A slip of the table saw blade will create a void where the glue may not work as well.  
  3. There are a lot of structure pieces.  From the floor to the walls to the bracing and the roof, there are some 50+ different pieces that are used in the structure.  That's a lot of cutting.


Those are the real challenges of the cutting portion of building this great Advent House.  There are other parts that will present their own challenges, such as the Tower Faces and Tower Frame that are part of the Tower Kit, but they aren't in the top 5 because there are just a couple of those (compared with the 48 of window stuff).  The fencing kit isn't difficult to cut (all straight lines), but there are a lot of cuts.  The Corbels are tiny and can be a finger-grabber, so buying those might make since too.

In the end, I've developed these plans so that anyone can cut and build their own Advent House, but you may want to save yourself the time and effort by just buying the parts and pieces.  Or - go all out and just get the whole Mansion Kit.

Merry Christmas!

Friday, November 18, 2011

Shipping Kits!

We're shipping out several kits to people who are getting a start on building their own Advent House.  You should be getting yours too.  We have almost all parts in stock now so the lead time on this Mansion Style Advent House is going to come down lots!  Order your kit today so that you can get started building.  With some focus and time, you can have your Advent House done before Christmas Morning!

Just imagine how beautiful it will be sitting on your side table!

Monday, November 7, 2011

Illustrated Atrium Build

This is an illustrated guide to the construction of the Atrium.  By now you should have the tools you'll need including things like a good exacto knife, spray adhesive, CA Glue, etc...  Please be sure to have some wax paper on hand to prevent the CA glue from getting places you don't want it!

So without further ado......


----------------------------------------------------------


NOTE! Before painting or placing vellum, make sure you lay out your faces for proper orientation on the frame.  See the Plans for more information.  You don't want to accidentally paint and vellum the same side of each piece.

First, Paint all the Atrium Faces.  Be sure to get the edges of the faces as well.  You don't have to paint the Atrium Back or the structure because they won't be seen from the front, but you have the option to paint those too.  I chose to paint the back of the Atrium Back black.

Second, Attach all the faces to the vellum using the same technique used to attach the Tower Faces to the vellum, (shown here).


----------------------------------------------------------

Lay out Faces

Using the Atrium Back piece (1/4" MDF) for alignment purposes, layout the Atrium faces.  Please note the hole in the vellum in the image.  You MUST remove the vellum from this section to allow for better passage of light into the tower.

Be sure to check the orientation of the pieces according to the plans.

----------------------------------------------------------


Attach the Center Beams

While the faces are still aligned using the Atrium back, place a piece of the 1/4"x1/4" Basswood as shown in the image.  We'll replace that piece with the full back piece (that's currently in use as an alignment tool) in a moment.  But for now we use it to ensure proper placement of the two center beams.

Please note the two center beams are 'straddling' the seams of the faces.

----------------------------------------------------------


Front Long Beam

Align the Long Front Beam across the front of the atrium.  Make sure the distance from the front edge of the face to the beam is the same all the way along the atrium.

NOTE: The Front beam will not reach all the way from face edge to face edge.  It will be slightly offset to provide space for the side faces.

----------------------------------------------------------


Front Bump Beams

Attach the front beams as shown in the image.

----------------------------------------------------------


Align the Atrium Back

Once the two center beams are in place, and being VERY careful not to move the faces, we remove the temporary 1/4" x 1/4" Basswood and replace them with the Atrium Back.  Using one of the Longer Atrium structure pieces, you can easily align the back of the atrium with the edge of the Atrium faces.

Please NOTE!  Center the Atrium back on the Faces.  The faces will overhang the back just a bit.   This is correct, it allows the 'side' face to sit inside/under the 'top' face.  You'll see better as we add the side faces.


----------------------------------------------------------

Glue Well!

Once the Back is in the right place, you then add the glue.  Keep in mind that if this Atrium is lifted from any part other than the back, it will threaten to come apart because of the weight of the back piece.  So be sure to glue the back on well and be sure to glue the back to the beams too.

And for that matter - make it a habit to only lift the atrium with two hands and preferably from the back.

----------------------------------------------------------


Add Side Face

Once the back and top faces are in place, the rest gets a little easier.  You can attach the side face next.  Ensure the back edge of the face is flush with the back edge of the Back piece.  This provides ample gluing surface and ensures room for adding the front faces.

NOTE: To both sides before doing the fronts.

----------------------------------------------------------


Add Front-Sides

After adding the Sides, Add the Fronts.  The angle is determined by the two sides.  Be very gentle in this step since there is no structure under the faces yet.

Glue the available edges (sides and top) and you should have it strong enough to carefully move it around as needed.  Just remember to lift from the back piece.

----------------------------------------------------------


Add the Sides-Short

With the same method as the Front-Sides, add the two Sides-Shorts.  again, the angle is determined by the existing faces.  Glue along the top edge to hold for now.

----------------------------------------------------------


Add Front-Center

And add the Front center piece.  Make sure the edges line up with each other for smooth corners.

----------------------------------------------------------


Another View

Here is an angled shot of the faces all attached.

----------------------------------------------------------


Add Posts

Now carefully flip over the whole thing and lay on it's top.  Place the Frame-Posts into place, ensuring they are not sitting over the top of the openings. (because we want the light to go through there).

The placement as shown in the image is suggested.

When happy with the location, glue each into place.

----------------------------------------------------------


Posts glued in.

Notice the 2 posts on the ends as well.

----------------------------------------------------------


Add Long Bottom Beam

Lay the long bottom beam into place.  It should fit perfectly.  Assuming it does, glue into place.

Also note that I chose to paint the back of the Atrium Back black.

----------------------------------------------------------


Add Bump Structure

I found it easier to glue the front bump structure prior to placing.  Just glue it in the correct orientation and allow to dry.

NOTE: I don't show the addition of the two side beams, but be sure to add those as well.

----------------------------------------------------------


Place Bump Structure

When that structure is glued, place and glue.

Now go back and run light beads of the thin CA glue to ensure a great fit.

NOTE: Make sure you don't allow any glue to run into the open areas or it might be visible through the vellum after you turn lights on inside.

----------------------------------------------------------


DONE

You can see that all that work produces a very lightweight but still sturdy Atrium upon which will sit your beautiful Tower!
----------------------------------------------------------

And that's it!  It really is beautiful and shouldn't have taken too long to put together.  Any questions can be directed to the AHP Forums.


(cj)

Illustrated Tower Build

This post illustrates the process to build the Tower that sits on the top of the Atrium on the Mansion Style Advent House.  Questions are welcome on the Advent House Plans Forums.

The construction of each part of this Advent House requires similar tools.  This list can be found here.  You'll also need spray adhesive such as a general 3M spray.

-----------------------------------------------
To begin the Tower Assembly, you'll need to paint the Tower Faces.  You only need to paint one side of each face, but be sure to paint the edges as well.  You can easily paint the faces by hanging them from a re-bent paperclip that is hanging from a string strung across your garage (or outside if the weather is nice).  Be sure to follow the instructions on the can of spray paint.

When complete, this tower can be set on the Atrium facing any of the 4 directions, but it's designed to have a wide tower face facing out.  This way you are less likely to see the edges of the other faces.

-----------------------------------------------

Tower Face Layout

We begin assembly by laying out the Tower Faces on a piece vellum.  We'll glue the faces to the vellum, then cut away the extra vellum.

Lay out the faces, painted side up, to be sure the pieces fit nicely on the vellum.

Then, remove the faces, turn them Paint side down on a large open newspaper.  Using spray adhesive, lightly coat the backs of the faces.

Then turn the faces over and lay them back on the vellum. DON'T Move them!  Once they are placed, don't move them around or you'll get adhesive streaks.  Use a book to ensure proper pressure and adhesion of the glue to the vellum.

-----------------------------------------------


Cut Out the Tower Faces

After the glue dries, use your very sharp exacto knife to cut away the excess vellum from around the tower faces.
-----------------------------------------------

Tower Faces cut out

This shows all 4 faces cut out of the vellum.

-----------------------------------------------


Start Structure

Next we attached the faces to the two structure pieces.  Make note to use the 2 Narrow faces for this step.

Please Note! You need to align the TOP of the Face with the TOP of the frame. (fat frame side down).  This leaves a small amount of frame sticking below the face.  This is to help the tower stay in place on top of the atrium.
-----------------------------------------------


Other 2 Faces

Now add the two Wide faces, again - aligning the TOP of the frame with the TOP of the face.

That was easy.

-----------------------------------------------


Cuppola and Trim

Next we grab the Tower Trim and the Cuppola.

-----------------------------------------------


Tower Trim

Wrap a piece of Trim around the very base of the Cuppola.  Hold the trim in that position (as shown in the image) and dip the trim into warm water.

This allows the wood fibers to bend a little and it will help the trim hold it's shape better.  Hold the trim until dry.  Should be just a couple of minutes.


-----------------------------------------------


Cut Trim to Fit

Now cut the trim to the correct length.


-----------------------------------------------


Glue Trim onto Cuppola


Using the Gap Filling CA Glue, glue the trim to the bottom of the cuppola.

You will want to hold this into position (especially the ends) for several minutes.  The ends will tend to want to pull away if you don't hold it long enough.


-----------------------------------------------


Trim Attached (01)

This image shows the trim attached around the bottom.  You can also see the connecting ends.  You'll want to make note of that connection and ensure it's on the 'backside' of the tower for installation to avoid it being seen.

-----------------------------------------------


Add the Other Trim

After using the same method to help bend the trim, you can cut and apply the 4 trim pieces to the cuppola.  be sure to hold them in place long enough so they won't pull away.

** Please note.  You'll want to be sure to orient these 4 pieces with the other trim piece in consideration.  You'll want the bottom trim to be on the 'backside' of the tower and have these 4 pieces oriented on a 45 degree angle.

Also note that you'll be drilling a hole in the top to insert the spire so no trim at the top is needed.

-----------------------------------------------


Paint the Cuppola

Once the trim is attached, you can paint.

-----------------------------------------------


Attach Cuppola to Frame

With consideration of how the tower will be sitting on the Atrium, align the Cuppola, and glue in place.

You'll note in this picture that I did not get the edges of the faces painted well.

This image also doesn't show the spire attached.  You'll need to drill a hole in the top center and insert the spire.

-----------------------------------------------


And that's it!  The tower is quite easy to build.  Just be sure to have everything planned and be specific in the process.  It will look great!

I'll be adding instructions for the Atrium here as well so watch for those to come available.


(cj)

Illustrated Structure Build (part 2)

This is a continuation of the Illustrated Structure Build.  To view the previous steps, Go to Illustrated Structure Build (Part 1).


This section involves angles so taking a short break before starting might provide you with a little extra patience in case things don’t line up exactly as you want them too. Keep in mind that you have the option of adding an exterior roof finish to cover any possible roof construction flaws.

Lets get started.....
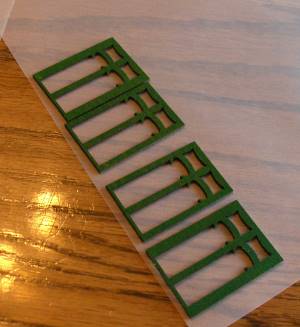


Middle Bracing

Now we start to add the Middle bracing which will provide additional support to the angled roof pieces, as well as provide a little more outwards extension of the roof pieces. Without these pieces, either the roof pieces would sit too low or the wall piece would be too tall and you’d have window problems.


Glue Middle Bracing

You can see here that the middle bracing pieces need to be sanded/cut slightly with the needed angle. See the Plans for details.  Glue these Middle Bracing pieces in with the sloped edge out and the angle sloping up and back.

Use the same gluing techniques discussed earlier to attach all of this middle bracing. Be sure to dry-fit the pieces first to ensure they are all properly oriented.


--------------------------------------------------------------------------------


Sand outside Corners

After gluing all of the Middle Bracing pieces into place, you’ll note that the ends of the middle bracing are not angled correctly. You can use sandpaper or a dremel tool to sand these end edges equal to that of the connecting bracing.


--------------------------------------------------------------------------------


Mark for the Soffits

Now we mark for the soffits that are to attach to the front of each wall. Refer to the plans for the exact location of these markings. Using a straight-edge of some sort, mark the full line where the soffit will sit (details are in the plans). Be sure to mark where the soffit will sit on that line (above or below the marked line).


--------------------------------------------------------------------------------


Mark All Walls

This picture shows the marking of the soffit line on the front wall assembly.


--------------------------------------------------------------------------------


Walls Marked for Soffit

If you look closely at this picture, you can see the markings along this side wall for where the soffits will be glued on. Having marked all of the walls on the exterior, at the location specified on the plans, you are now ready to glue the soffits on.


--------------------------------------------------------------------------------


Glue the Soffits On

So we get started on gluing the soffits into place. Assuming you marked the walls correctly, you simply add the Gap filling CA Glue to the edge of the Soffit piece and stick it on there. Since these pieces will be just ‘hanging there’ until we get the roof pieces on, you’ll probably want to hold it tightly in place for about a minute, and – as long as it looks good – go ahead with the thin CA glue to get it really secure.


--------------------------------------------------------------------------------


Gluing the Soffits

The actual order of placement of the soffits isn’t really essential to the process, but you’ll want to be sure you can get all the pieces in without disturbing any other pieces too much. I chose to jump from the outside wall to the short wall, but you can do yours in any order.


--------------------------------------------------------------------------------


Soffits in Place

And you can see the soffits are now in place. Add an extra line of the thin CA glue for extra strength and allow to dry completely before continuing. Our next steps will be to add the angled roof pieces so it will want to break these soffits off if it’s not well dryed.


--------------------------------------------------------------------------------


Soffits On

While using the thin CA glue, be sure to hit the connections between the two soffits, not just the connection between the soffit and the wall. Anywhere a piece connects with another piece.


--------------------------------------------------------------------------------

This seems as good a place as any to stop for a moment and allow the soffits to dry really well before continuing. As we move into the roof pieces in these next steps, you’ll need to really plan ahead. With the fast gluing times and the complicated angles, you’ll need to know what is going on where and when to get it all in place quickly. An extra set of hands is really helpful here.


--------------------------------------------------------------------------------


Mark the Top Edges

While the soffits are drying, we move to the roof pieces. This picture shows the outside lines marked on the bottom side of the flat roof piece. There is no defined ‘bottom side’, so pick a side and it will do. Using the same technique as in the beginning, mark the edges all of the edges of this roof piece. Check with the plans to see how this is all going to go together in the end.


--------------------------------------------------------------------------------


Glue Top Bracing

After marking the edges, we now layout the top bracing, making particular note of the orientation of each piece, then we glue, using the same method as on everything else. First – the Gap Filling, then the Thin stuff. Notice the extra glue on the connections between each bracing.


--------------------------------------------------------------------------------


Top Bracing Glued

This is the front step-out for the walls, with all the top bracing glued into place. Notice I haven’t run the thin stuff along the edges (I ran out and had to go buy more at the local hobby shop).


--------------------------------------------------------------------------------


Glue Roof Pieces

Now it’s time for the more difficult parts. Because of the odd angles that are generated due to the double-angled roof, the pieces may not fit as perfectly as you’d like at first. The objective is to get enough gap filling glue in place to hold them until they dry. You won’t want them to be completely dry until you have them all in place with the flat roof piece on top. An extra set of hands here is very helpful as well. (in this image you can see I cut my front window wall soffit pieces just a hair short – oops).


--------------------------------------------------------------------------------


More Roof Gluing

In this picture, you can see I have the side walls roof pieces in place, along with the two short side roof pieces and it’s ready to receive the front roof piece. If you do it in this order, you can ensure that the front piece is centered on the soffit.


--------------------------------------------------------------------------------


Add the Flat Roof Piece

With all of the angled roof pieces in place and with the glue in a semi-dry state, you can now dump the glue on the top edges and prep to put the actual flat roof in place. If you have the pieces all correct, the bracing you put on the bottom side of the flat roof will fit perfectly just inside each of the angled roof pieces.


--------------------------------------------------------------------------------


Placing the Flat Roof

With plenty of glue in place, get the Flat Roof piece to sit into place, applying sufficient pressure down so that the seams are as tight as you can get them. Assuming the soffits are on strong and the angled roof pieces are at least semi-dryed, it should be plenty strong to add that pressure downward. On this one, you’ll probably want to hold it there for a number of minutes. If it’s secure enough, some good heavy books may also help while the CA glue finishes drying. Since you can’t use the thin CA glue from the underside, you’ll probably need to wait for this flat roof piece to dry, turn the whole thing over, and then apply liberal amounts of thin CA glue to the seams.


--------------------------------------------------------------------------------


Last Structure Pieces

It’s almost done now – add the two back pieces, holding in place until it’s well set. If everything is in it’s perfect place, this back piece will fit in perfectly. If not – you’ll need to fenagle it just a bit. Put in both the top and bottom back pieces. When completed, you, as the builder, will decide whether you want to fully close off the back with spare flat material.


--------------------------------------------------------------------------------

And that’s it! All of the structure pieces are in place, they are all glued and strengthened and tight. Eveything fits and looks great.


--------------------------------------------------------------------------------


Finished Structure

So here it is - the final structure completely assembled. What did it take you? 2 hours? Maybe 3? Not bad for having the major portion of this house complete. Now we move onto much more detailed and finish pieces that will take more work and time.


--------------------------------------------------------------------------------
So – I hope you’ve enjoyed this illustrated guide to building the main structure of the Christmas Vacation Advent House. We are always interested in your comments, questions and suggestions at our Forum. Be sure to stay signed up there and keep an eye out for more detailed information coming. Be sure and buy all your parts here and save yourself time and frustration of miscuts.

Please feel free to post comments or questions on the Advent House Forum.

--------------------------------------------------------------------------------

(cj)