START HERE!
Always start with this link to see the Order of Operations for the Mansion Style Advent House. That is where you'll have access to links to all of the most current instructions.

Friday, October 2, 2020

New Door Assembly Instructions

These are the illustrated instructions for assembling the new Laser Cut Door Frame Kits.  This kit is cut from 1/8" Baltic Birch Plywood which makes it light weight and easy to assemble with precision tabs and slots.


These following steps show you how to assemble the new Door Frames. 
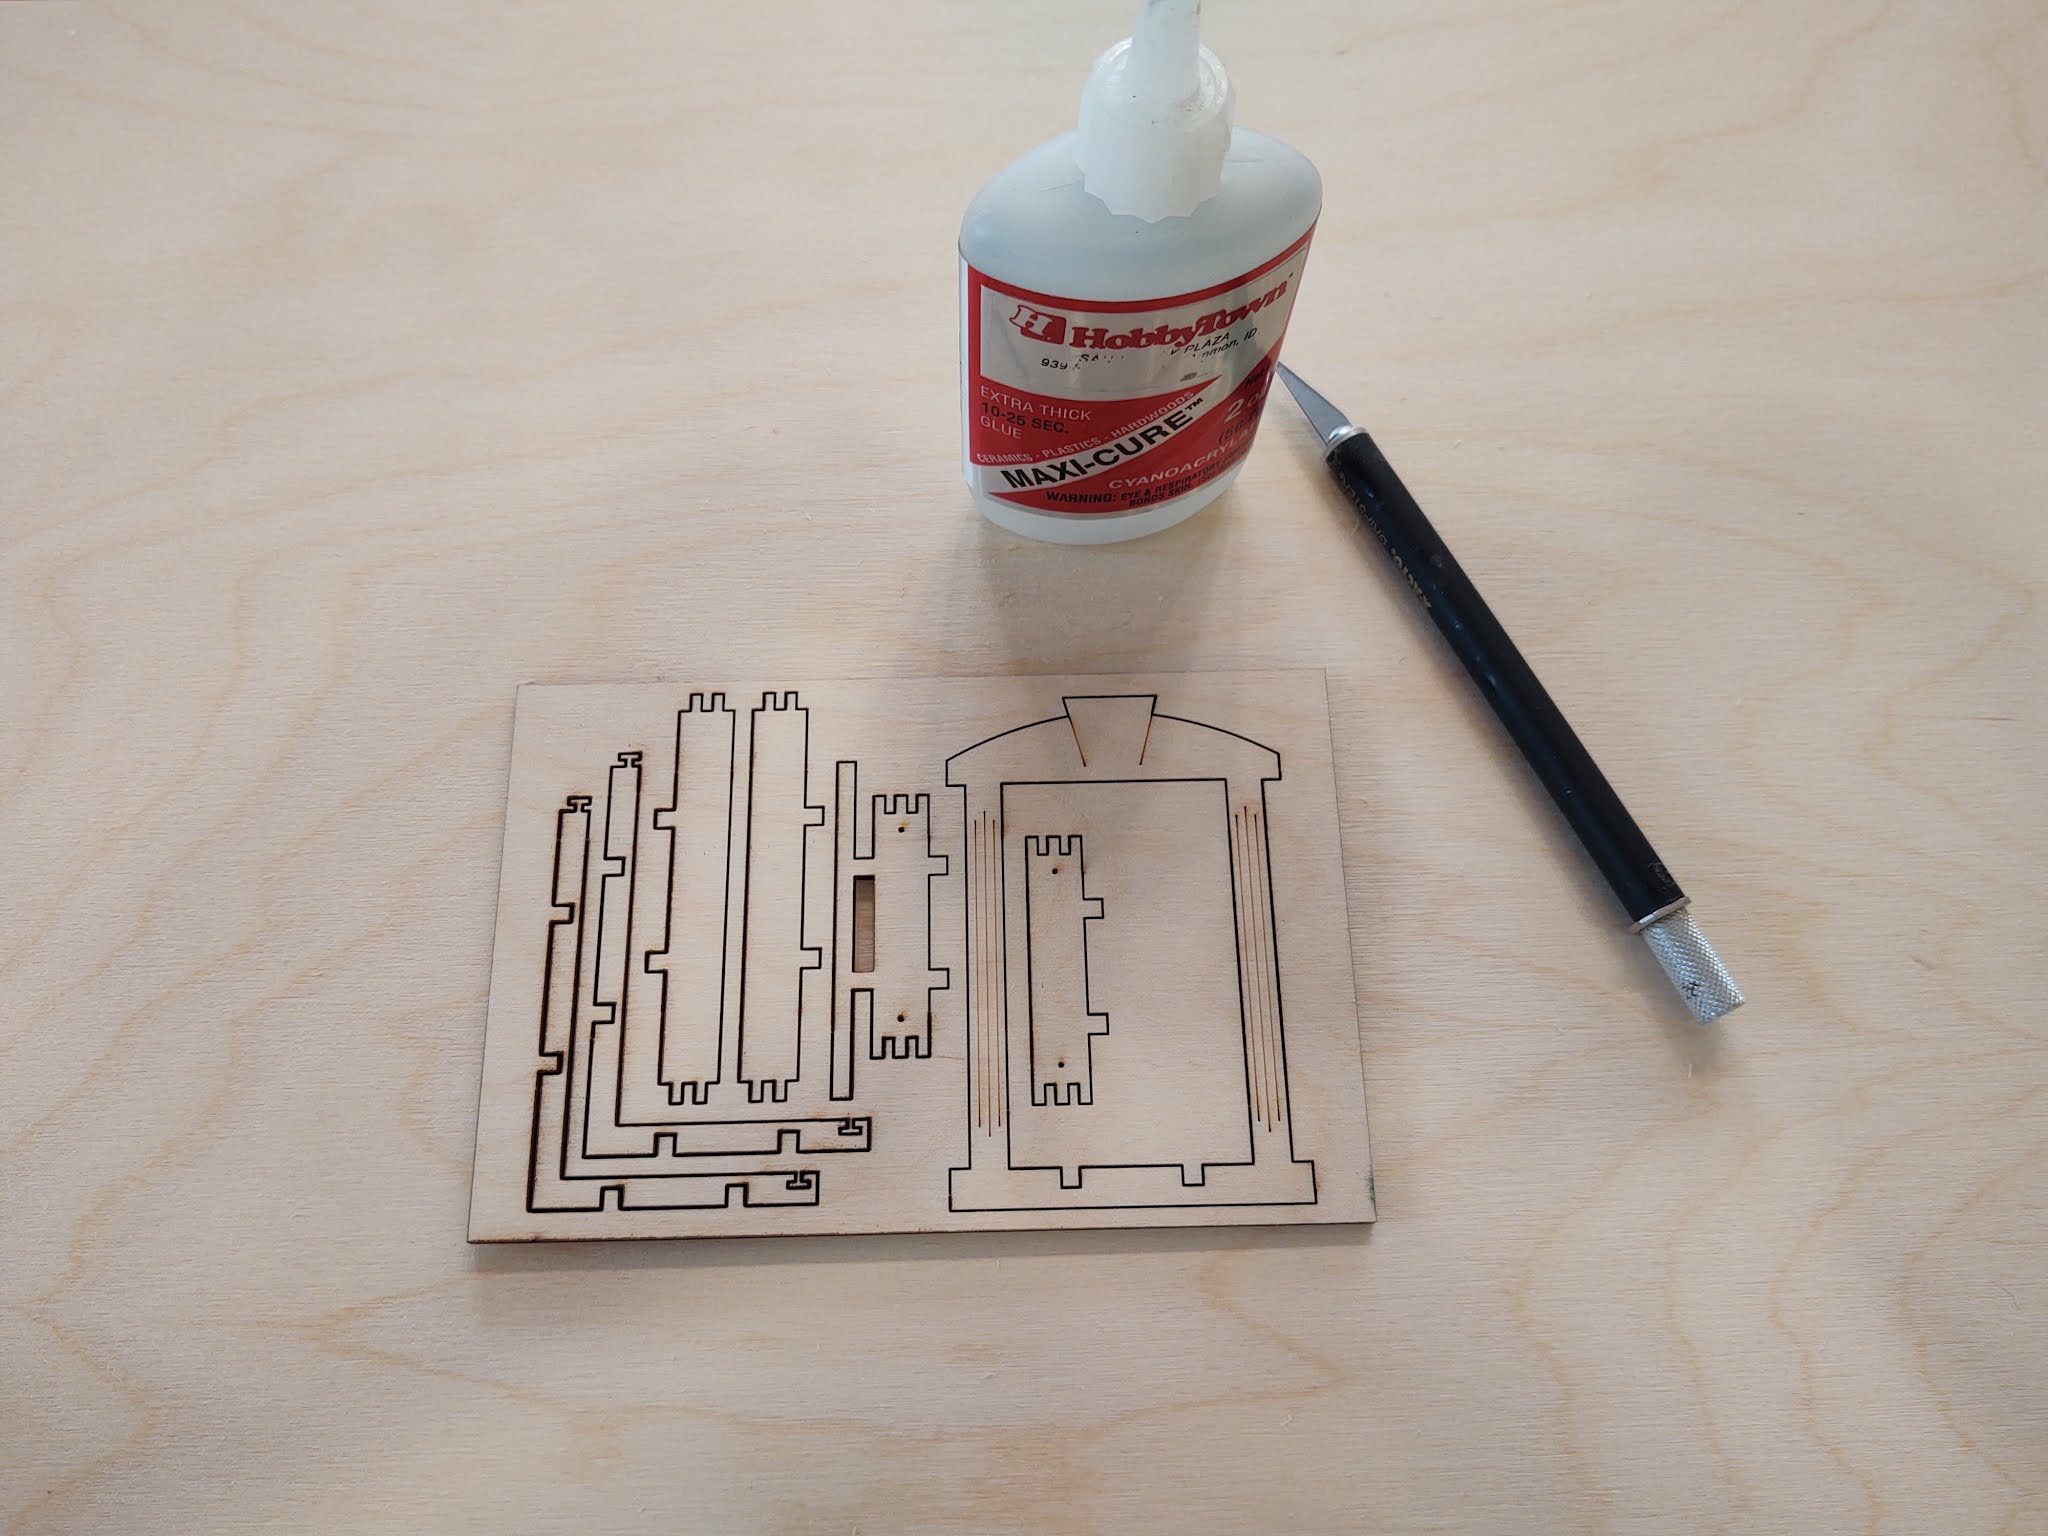


KIT BLOCK:


Like many other parts, the Door is mostly contained in a pre-cut kit block.  The door also requires Panels, the inserts, and the hinge pins.  These items are not shown in this assembly instruction.


CUT OUT PARTS:

Most of these parts should pop out of their blocks fairly easy.  However, it's wise to take the time to turn the block face-down and cut as far through the tabs as possible.  Since this is plywood, there may be some places where the laser has not cut all the way through.  Take your time to finish cutting through those areas with an exacto knife.  Lastly, clean up the location of each of the tabs with the knife or light sandpaper, just to be sure the parts assemble with ease.


INITIAL PARTS LAYOUT:


Once the parts are removed from the block, begin layout as shown above.  The top of the door is at the top of the image.  Align the different small brace tabs with their matching hole patterns.   

Stand up the sides:


Stand up the 4 side pieces, align with the tab/slots on all sides.  


Glue The Inside Corners:

Add glue (we use CA Glue) to the inside corner, at each corner, making sure to contact the 2 edge pieces and the bottom (back) piece.  You don't need much.  This is just to hold it in place for now.  Once glued, be sure to hold the frame tight together and square, as well as down to the back piece.  (but don't glue it to your workbench!)


Add More Glue:

Once the corners are pretty well set (and you can carefully move the piece around without it coming part), add more glue to the 4 inside edges.  This is to connect all of the frame to the back piece.  Hold tight and allow to dry/cure fully.

When you have the part well glued and cured/dry, you can then stand the frame up and glue the exterior dovetailed corners.  We use a thinner CA glue so that it will seep down into these joints, making them very strong.  Do this on all 4 corners (being careful not to glue the whole thing down to the table you are working on)


Assemble the Face Frame:


Using the frame you just assembled for spacing, layout the 3 face pieces as shown above.  Be sure to use the assembled frame with the small arrow pointing towards the face frame.  Do this step with the face frame FACE DOWN.  Add glue to the 2 joint locations and allow to dry/cure.


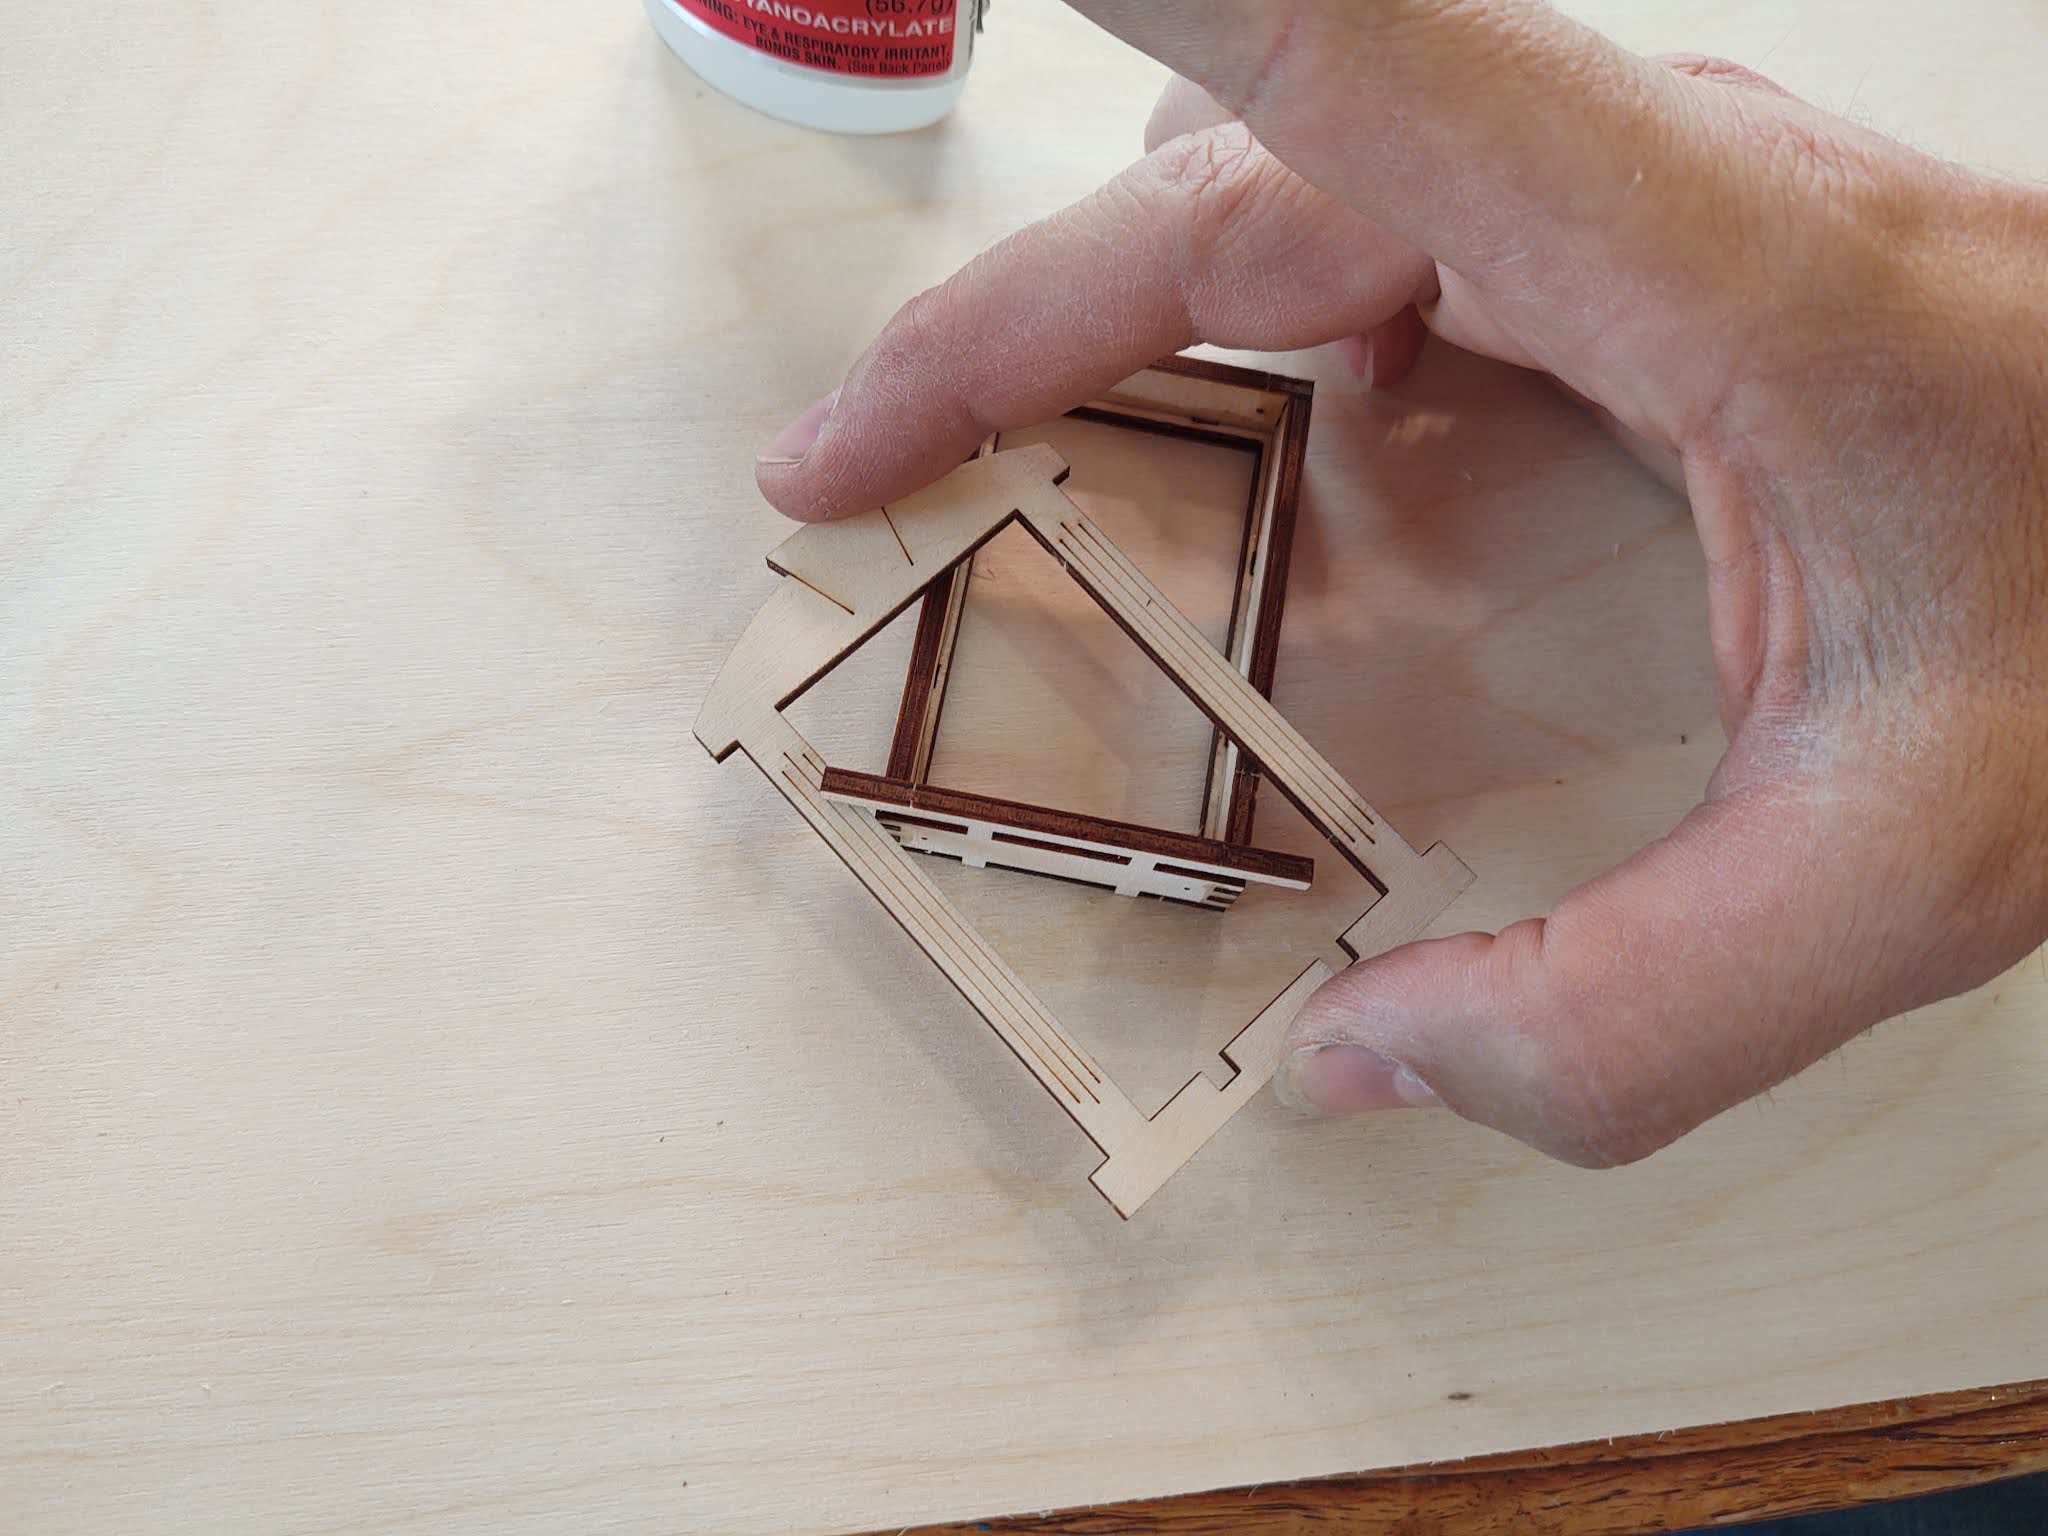
Add the Face Frame to the Frame:


CAREFULLY, lift the face frame and set on top of the frame, slipping the bottom tabs into the door sill.  You'll need to adjust the frame and the face just a bit to get it to be square.  Once the test fit works, remove the face frame, add glue to the front edges of the frame and replace the face frame.  Square the door up again and hold tight until it is fully dry/cured.


DOOR PANELS ALIGNMENT:


Dryfit and align the back panels with the front panels. 

NOTE: 
#1 - The thinner panels (with line etching only) are the back panels, the thicker front panels (cut through) have a hinge hole.
#2 - The small squares both need to be at the top of the door.
#3 - There is a small bump on the hinge side.  This little bump should align perfectly with both the front and back panels.  This is how you verify you have the doors aligned correctly.

Most importantly, YES - the back panels are different widths than the front panels.  This is designed so that light will not come through between the doors.  When the panels are assembled, the right hand panel will open first (because the back panel of the left-side door will be behind the front panel of the right-side door)


Once aligned and you are sure the correct panels are in the correct place, you can then add glue to the back of the front panel, align with the back panel (while pressing both down on a hard surface to help align the side) and carefully press the two panels together.

Most importantly, please be sure these two panels are well aligned.  In the event they aren't perfect, you can use an Exacto knife to trim off any overhang of the back panel.


Repeat on the other door panel (shown above)

The next step on the door panels is to round over the hinge side.  This can easily be done with a simple piece of sandpaper, or you can carefully use a band sander - whatever your preference.


As shown in this image above, you want to round off that hinge edge just a bit so that those corners don't interfere with the frames while the doors are swinging.

Just note - it's easier to sand more off than to add wood back on, so sand slowly until it looks and works well in the frame.


RAISED PANELS:


Now we add the raised panels into the Frame cutouts.  Do NOT use super thin CA glue here - you probably want to use a gap filling/thicker one.

Layout the small raised panel pieces on either side of the door, to align with the proper sized openings. 

Add CA Glue to the openings (you can do them one at a time if you'd prefer).


Now drop the correctly sized raised panel into the correctly sized opening ** BUT Don't Push It Down Yet! **

Instead, use an Exacto knife to carefully move the raised panel a bit (the raised panel will 'float' a little on the thicker glue) until you have it where you want it (probably centered in the opening), then carefully apply pressure to the raised panel until it is well glued down.  At this point - the raised panel piece should not be able to move at all. (so make sure you get it right the first time).


Then repeat for every opening, as shown above.


Do one more application of pressure over each piece just to be sure they are well secured.


And now the panels are assembled.  And in this image above, you can also see how the back panels are different widths and allow them to 'nest' with the other door when closed.

And that's it for the assembly of the new Door kit.  You'll then want to paint, then apply the vellums, then final assembly and attachment to the structure!


Questions?  Please feel free to contact us on our website or our etsy store!


New Window Updates - Assembly Instructions

 These are the illustrated instructions for assembling the new Laser Cut Window Frames Kits.  This kit is cut from 1/8" Baltic Birch Plywood which makes it light weight and easy to assemble with precision tabs and slots.


These following steps show you how to assemble the new Window Frames.  We are demonstrating with a small window, but the process is identical for both the medium and the large windows as well.


KIT BLOCK:


Like many other parts, the Windows are mostly contained in pre-cut kit blocks.  The windows also require the shutter, the keystone, the hinge pins, as well as the dormer parts (if using as a dormer). These items are not shown in this assembly instruction.


CUT OUT PARTS:

Most of these parts should pop out of their blocks fairly easy.  However, it's wise to take the time to turn the block face-down and cut as far through the tabs as possible.  Since this is plywood, there may be some places where the laser has not cut all the way through.  Take your time to finish cutting through those areas with an exacto knife.  Lastly, clean up the location of each of the tabs with the knife or light sandpaper, just to be sure the parts assemble with ease.


INITIAL PARTS LAYOUT:

********** NOTE *****************  
We now have 2 different small window kits included in the full Advent House Kit:
3 Wall window kits.
9 dormer window kits.
*********************************


Wall Version
Dormer Version


Once the parts are removed from the block, begin layout as shown above.  The top of the window is at the top of the image.  Align the different small brace tabs with their matching hole patterns.   

Stand up the sides:

Wall Version
 

Dormer Version: (note the orientation of the top frame piece)


Stand up the 4 side pieces, align with the tab/slots on all sides.  


Glue The Inside Corners:

Wall Version:

Add glue (we use CA Glue) to the inside corner, at each corner, making sure to contact the 2 edge pieces and the bottom (back) piece.  You don't need much.  This is just to hold it in place for now.  Once glued, be sure to hold the frame tight together and square, as well as down to the back piece.  (but don't glue it to your workbench!)


Add More Glue:
Wall Version:

Once the corners are pretty well set (and you can carefully move the piece around without it coming part), add more glue to the 4 inside edges.  This is to connect all of the frame to the back piece.  Hold tight and allow to dry/cure fully.


Add Exterior Glue:

Wall Version:


When you have the part well glued and cured/dry, you can then stand the frame up and glue the exterior dovetailed corners.  We use a thinner CA glue so that it will seep down into these joints, making them very strong.  Do this on all 4 corners (being careful not to glue the whole thing down to the table you are working on)


Add Face Frame:

Wall Version:


Dormer Version:


The face frame fits on the front, after twisting into place.  Do a test fit before adding glue.  Twist the face at an angle, then slip over the sill of the bottom frame piece.  Then twist the face upright, interlocking with the sill.  Then slide the face up to lock into the tabs of the bottom frame piece.  This should create a very square window frame.  You may need to apply a small amount of pressure to the corner of the face/frame to ensure the face is perfectly square to the frame.
Once a test fit is successful, go ahead and remove the face, add glue to the front edges of the frame, and reassemble the face.  Ensure the face is square with the frame, then hold tight until the glue is dry/cure.


The Dormer Windows have just a few more steps and they start with the rest of the dormer pieces lay out like this:


Add Top Structure:
Add one of the two 'UFO' shaped pieces as shown above.  Glue this in.

Add the other UFO piece on the back side of the top frame piece, as shown above.  Insert its tabs into the slot spots.


Now test fit one of the side dormer pieces, as shown below.  Assuming it fits nicely (and it should), go ahead and pull that off and remove the 2nd UFO shape piece.  Now add glue to the 2nd UFO shape piece and place it back in place.  Then add glue to the one side of the dormer top and set it in place.
Repeat the glue up on the other side of the dormer top.

Then glue in the top center piece of the dormer.  And you get what you see in the pictures
 below:

Be sure to allow the dormer top parts to glue/cure fully before adding these side pieces.  Once the top is well glued, add these dormer walls as shown below.  Test fit (pushing the dormer wall up under the dormer top), then remove, add glue and hold in place.  Repeat on the other side.


And that's the remaining steps for the dormer.  


Now STOP!  That's right - just stop a moment and take one important step before you go to painting.

You need to assemble the shutter to the frame for every single window.  This step is important because you need to be sure that the shutters all swing freely before you go to painting.  If any of the shutters aren't swinging like you want them to, take the time to do the light trimming/sanding now (before painting)

Use the hinge pins to now assemble the frame with the shutter.  THIS is the moment you now decide which direction the window shutter will swing out.  There are hinge holes on both sides of the frames so to change the direction of the shutter swing, simply rotate the shutter 180 degrees.

******* NOTE: ****
For the dormer hinge pins that go on the top of the dormer windows, (not the bottom ones) you'll need to use some small wire snips to cut off the head of the pins. Then insert the pin into the top of the window shutter, then insert that cut-off pin up into the bottom of the window frame top frame piece, then align the bottom of the shutter with the bottom frame hole and insert a 'non-cut off pin' from the bottom up into the shutter bottom hole.

** You may also choose to number the frames and shutters at this point.  This way you can know for sure that the shutter swings correctly for THAT frame. **

Once all of the shutters are swinging like you want them to, you are free to move to the next step.


PAINTING:

NOW we paint!  We used a forest green spray paint on this one, but you can choose whatever color and medium you like.  We suggest using a fast drying NON-ENAMEL spray paint.  We get ours from Walmart or Lowes.  Make sure you do all painting in a well ventilated area.

PAINT ALL SIDES of these things  Make sure you paint inside the frame on the inside edges.  Make sure you paint from above, below, sides, front and back.  We ensure every surface is painted sufficiently.


ADD VELLUM:

Add Vellum to the Window Shutter by placing a very small bead of Medium CA glue on the backside of the shutter, laying an oversized piece of vellum on carefully, then allowing to dry.  Once dry, use a very sharp Exacto knife to trim the excess vellum.


FINAL ASSEMBLY:


And the window is nearly complete!  Of course, at this point, you'll want to put the window knob on (using the same Medium CA glue).  And you could then do any additional painting/decoration you'd like.  For example, maybe add gold or silver color to the vertical stripes on the window face.  Add the window numbering to the keystone, etc.


Questions?  Please feel free to contact us on our website or our etsy store!